It has been such an eventful week! I set up exhibitions in Seattle on Monday, Auburn on Wednesday, had a reception on Thursday and Open Studio Tour on Saturday. Needless to say, today has been a slow day of recuperation after all the work and being in the spotlight. Here are some photos of the events.
Everything went great at our opening at La Familia Gallery in Seattle on November First Thursday. We had several hundred people stop by our gallery. Everyone seemed to like to work up on the walls- I got several chuckles from people interacting with my peeping tom cat boxes, which made me feel great.
Here are Zanetka Gawronski, Brad Strain and Mirka Hokkanen, all ready for our big reception night.
Here you can see my inconspicuous peeping tom cat box. When you push the slice of wood on the bottom, a cat comes out of the top.
Zanetka enjoying friends at the reception.
Open studio tour in Tacoma. I took two presses, tools, blocks, proofs and prints to my old studio space in Tacoma to share what I do with people. I had made a little keepsake linoblock that people could roll up with ink and print to take home from the event. The space is shared by 3 other artists, so we were able to pull a nice crowd over the course of the day.
So here we are placing the paper over the linocut.
And rolling it through the press...
Some of the kids got interested in printmaking and wanted to try their own had at it.
Here's what my space looked like before the crowd came in.
Just outside of the window was this awesome roof with moss growing in a pattern on it.
And of course, I am always greeted by Nappi our Aussie when I get home at the end of the day. She has the knack as many other canines of looking like the poorest animal in the whole world to get some attention or even better food...
It has been such an exciting week. I just returned back from Minnesota from the Mid America Print Council Conference. It was well worth the trip. Every day was packed to the max with demos, lectures, exhibitions and of course hanging out with friends. One of my favorite things is the sheer amount of prints that you see in such a short amount of time. There is so much creativity out there and it is so much fun to see all the exciting ways in which printmaking media are being stretched. It will take me a while to digest all the things I learned and all the artwork I saw. Before it gets too late, I wanted to share as much as possible with you, and then it'll all go to the back burner for slower processing. I uploaded the better photos to my flickr site so you can see exhibition and event photos there. I did not realize it until afterwards, that I didn't really take pictures of people, just all the exciting things I saw at exhibitions and events. But I am sure you'll get the gist of it.
So here are shorter and longer excerpts of demos and lectures. The first video is from the Moku Hanga demo by Preston Lawig. Some people stayed after the demo, and Preston showed us how the plastic plate prints compared to a traditional shina plywood. I had never seen this plastic used for printing before, so that was pretty cool. I am pretty sure it was high impact poly styrene. Someone correct me if I have that wrong.
The second video is from James Ehlers engraving in the 21st Century demo. He had some new engraving tools that I had never seen before, so those were pretty cool. I had to break the video down to 3 sections, you can get all of them on YouTube. I also learned a new way of transferrign images to plates. James demonstrates that in the third video. You print with a lazerprinter on parchment paper and then rub that on your plate. the image is transferred and then you heat it up to adhere it better on your plate. you could use a hot plate, a torch or even a lighter. I have to try that out now.
Here's two pictures of what a traditional and the newer model of an engraving tool look like. You can tell the older is bent and longer and the newer is straight and shorter. The newer one is also made with a really tough metal, so that it lasts longer, but on the down side (or up depending on the way you look at it) is that you need a diamond honing stone to sharpen it. You can buy the modern version of the engraving tool online for about $33.
One of the keynote speakers for the conference was the young artist Swoon. She had an excellent talk on Friday morning. I was running out of time on the camera, but wanted to capture at least a couple of bits of her talk. I have been a fan of her work for a while now, so it was awesome to see her in person and hear her talk about her work. There are two separate videos I loaded of her, so go to You Tube to see the other one.
The Unevenly Distributed panel was also a joy to listen to. They discussed how old and new techniques and print and mixed media works all combined together in the art making groups that they were parts of. There were books, collections of paraphernalia, audio components, and all kinds of things that these groups were incorporating with prints. It was very exciting!
The three groups work that were discussed were Florida State University's Small Craft Advisory Press, Preacher's Bisquits Books and Impractical Labor in Service of the Speculative Arts (ILSSA). All of these organizations have great websites with lots of resources. The panel chairs were Denise Bookwalter and Chad Eby, and members Kristen Merola, Tate Shaw, Emily Larned and Bridget Elmer.
The video is 6 parts long, here is the first one, and the rest of them are on You Tube on my channel as well.
Whew, and if you haven't seen enough about printmaking yet, how about some chine colle. You can't have a print show with some one doing chine colle. Here the technique is tackeld on the enormous scale by Cole Rogers and Zac Adams-Bliss from Highpoint Center for Printmaking. I don't know if I will ever settle down and have a chance to print anything this large, but their technique is worth noting. It is very accurate and easy enough to do. You will also get some pointers on how to make chine colle paste and efficient application even on tissue-thin papers. This demo also two parts, see the other one here.
Last there is a short video of the "Let the Machines do all the Work" demo with Robin Schwartzman. I missed most of it, but they did another short run at the end of their time slot. The beginning of her video has a quick shot from the art building court yard, where they were doing a print extravaganza. It was already winding down, but looked like a lot had been going on during the day. I missed some of the fun things going on, they had a printing system, where they put a bed over the print and you would pull the proof by jumping on the bed. The bed gets moved over, and voila, your print is done!
This is a lot of info to cram into one post. Hope you find something interesting in one of them, and consider coming to the next conference. The next print conference will be the Southern Graphics Council one in St. Louis in March 2011.
Oh, and before I completely space out, I added my new work to my website, www.mirkah.com. Just click on the new works tab...
Soon to follow, exhibition news, catalog for sale (oooooh) and upcoming events!
I have an exhibition up at Tacoma Art Place at the moment. Quick exhibit info:
Where: TAP, 1116 S. 11th St. Tacoma, WA
When: until Oct 10th
(If you can't make it to this one, no worries, I have exhibitions coming up in November, January and April.)
TAP is a non-profit art center in the middle of Tacoma. It is a great (and affordable!) place where locals can get together and make art. There are sewing machines, ceramic equipment, a photography dark room, stained glass and beading supplies to name some.
The front office faces the street and has some walls open for exhibition space. If you are interested in having a show there, contact the TAP exhibition coordinator for more info. The show was easy to set up, and I like the way it turned out. I was excited to show some new pieces that have not been out if Tacoma before.
Just two pictures from the reception below. The Tacoma art bus stopped by and brought a whole bunch of people by, and I was asked to talk a little about the artwork. The bus is a pretty fun idea. The galleries in Tacoma are spread apart, so instead of trudging to each one by your self, you can have a party on the bus, which makes stops around the best galleries in Tacoma every third thursday. The tickets are only $10 for the whole night. I need to get on this bus next month!
My work has also been featured on a couple of Etsy treasuries and a blog in the last months.I love both of these treasuries. One has a bird theme, and the other has such pretty colors!
The same bird print was also featured on Diane's Etsy Favorites blog. Her blog is worth checking out, she features her favorite picks from the endless universe of Etsy items.
Oma koti onneni-thats Finnish and it means "My house is my happiness". The concept of a print with an aphorism with a border and embellishments comes from a Finnish handcraft tradition that was popular in the early 1900's (see small insert on left). We have several of these huoneentaulu's/wall hangings at our house, and I have been fascinated by them for a long time. I started a project to collect as many images of wall hangings as I can find and see what commonalities I can find in them and what they tell of their times. I want to update the old tradition that is about to disappear, and make contemporary prints that people still would hang on their walls today. You can find more information about the project here. For the main project for the letterpress class at SVC, I decided to try out some ideas gathered from the wall hangings I have been sent so far.
I started by setting a large border of type ornaments and type inside of it as seen above. This process took me hours upon hours to complete just to get all the little spaces filled up so that not even one little piece nudged inside the border. I then proofed the block on a small proofing press. That revealed a bunch more problems, with a couple of the ornaments being shorter than others and one that was very high.
You can see the arrow on the right, the ornament too high creates a halo around it, and some areas on the left and middle where the ornaments did not print at all or very faintly. To correct the shorter ornaments, I had to pull them out carefully and add a little piece of tissue paper under it to lift it up. That worked great.
Here you can see a closeup of the ornaments. Everything is bundled up really tight.
After the block was proofed, I was able to figure out how and where to carve my linoblock. Below is a mockup of the finished print dimensions and with the design drawn on the linoblock.
Here is a picture of the ornament border and type locked up front to back and sideways on the Vandercook press. I was able to get this done the previous weekend to printing, because just transferring everything and locking it up, revealed many more pieces that wiggled, so I had to keep working on it before it was ready to print. Below are some pictures from the middle of printing. You can see the finished print with two colors in the back and the front with only the ornament border and type printed on it.
Here is the linoblock locked up on the press with ink rolled and ready to go. The linoblocks are so much easier to lock up!
For the finished piece, I added a little bit of pink watercolor to highlight the flowers. It is really hard to capture a good image. It is printed on a cream colored Stonehenge paper, with fairly light inks- with the pink watercolor. Light colors dont transfer well on a computer screen. It looks so much better in person. The size of the print is about 9"x12" and the paper is a couple of inches all the way around. The original hand embroidered wall hangings are about 2-4 times bigger so I wish I could have printed larger, but the press that I had to work with limited the size to less than 15x18". This is a nice size though, smaller is always easier to frame and is still big enough to make a statement on the wall. I look forwards to working on this project, and eventually putting it all in a book.
For some people it is a mystery what I do, and how a piece of art is created. I finally remembered to keep a camera on me, so here is a little story of how my latest print came to be.
I am currently working on illustrating a book, where the main character is a little Winter Wren. I have been doing some research on the bird and found an interesting tidbit of information that I wanted to share with people. I also wanted to practice drawing wrens before starting with illustrating. So that's where the idea came from.
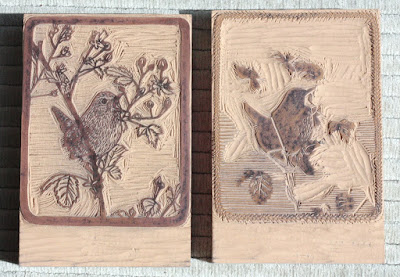
Making the Image and the Blocks. I looked through my own photos and through some online for reference for vegetation and birds. Then I had to figure out size- I wanted to make something small, so 4"x5" it was... I came with a sketch of the basic composition in my head, and then drew it out on a piece of paper as you can see on the left.
To make the print more interesting, I wanted to make it two colors. To figure out where colors should go, I transferred the original drawing on vellum, and then was able to trace the second color on top of it. When you layer them together you can get an idea of what the final print would look like.
I scanned the ink drawings on the computer, and printed them out on a lazer printer. The images were transferred to linoblocks as I described in my last blogpost. Where after I proceeded to carve them with linocarving tools.
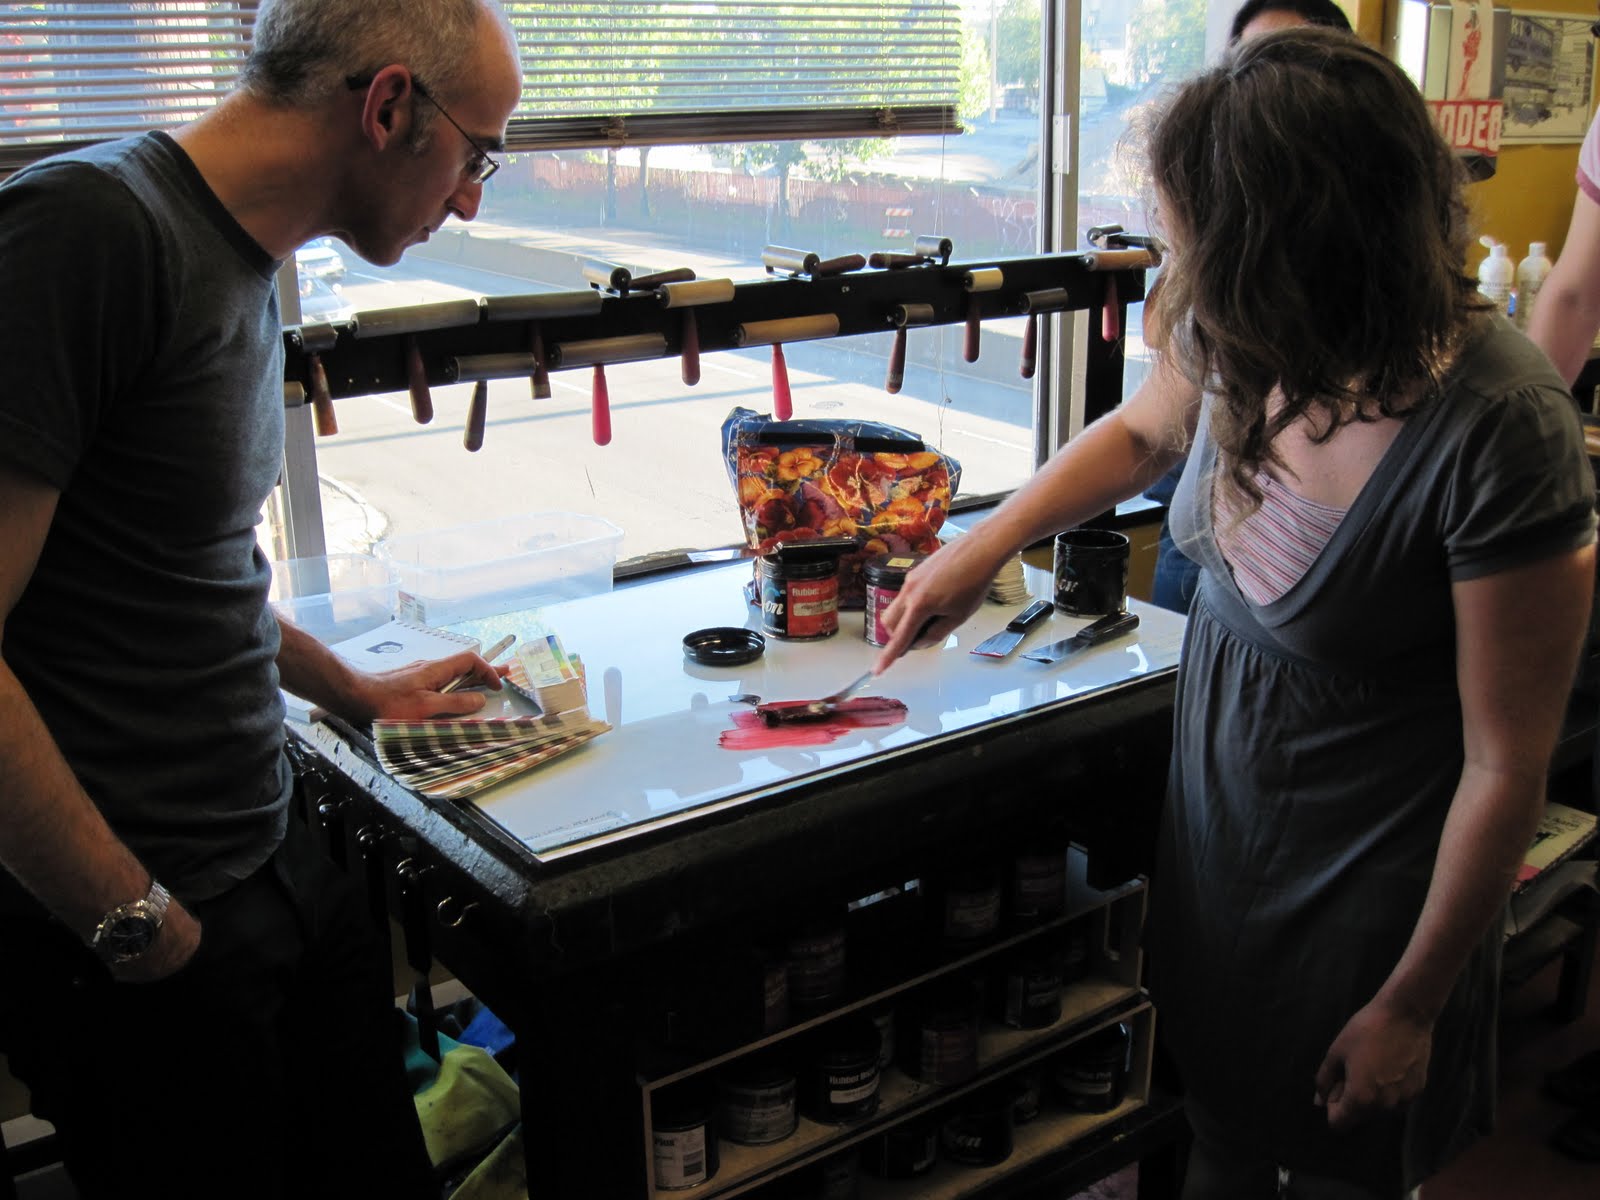
Paper, Ink and Text. Next I figured out what size paper would be best to print on and proceeded to tear big sheets to the right size. For smaller prints, in general it looks nice to have at least two inches of white paper on each side of the printed area. I had to also figure out what colors I wanted to print with and mix ink accordingly. For the text, each letter had to be picked out of a drawer and set in the form you want them to print with. (Sorry I forgot to take a picture of that...)
Printing. I was very excited to print at the letterpress shop at SVC Seattle with an old school Chandler & Price press. It's amazing to think that this press was built about 100 years ago! Wish they built things like that today... For this wren print, I had to print on each sheet of paper three times- first the light color linoblock, then the dark color linoblock, and after that the text with the dark color also. The press also had to be cleaned for each color of ink to print.
Finishing the Edition. Lastly, I could bring my fresh prints home, go through them to toss out all the bad/ misregistered ones, clean out dirty marks and then sign and edition the rest of the prints that made it to the edition.
Now after that being read, aren't you excited about trying printmaking too! You might ask, why would you do that to your self, would it not just be easier to paint a picture. Well, yes and no. Sure, I can paint it, but I absolutely love the physical processes of printmaking. I love carving plates, being worn out after a day of printing, even the never ending challenges when things don't want to work out (trust me there are a LOT of glitches). And as icing on the cake, instead of just one painting at the end of the day, I have a set of prints, that I can sell more affordably, so that many more people can enjoy my art (for sale here).
I found a quote, that describes everything quite well:
"I must confess, I love my press.
For when I print, I know no stint
of joy."
I think I need to have that on a t-shirt...
Next post, I'll write about the last half of the letterpress class at SVC (ref. last posting) and the print that I made for it.
As I mentioned a couple of weeks ago, I am taking a letterpress class with Jenny Wilkson at SVC Seattle right now. Class has been so much fun and I have learned at least a couple of new things about letterpress. In the first picture on the top our instructor, Jenny Wilkson, is showing us how to set type and how to transfer it from gallery to press without dropping type on the floor. It's all in the flick of the wrist. During the first class we all set our names in type and printed them all together on the press. We all got to take turns to crank out a sheet.
For our second class we were joined by Carl Montford, who is accomplished in wood engraving. He brought some of the most amazing broadsides to show and explained the process of carving to us. At the end of the class, we all got to work on our own linocuts.
I learned a new way of transferring an image onto your linoblock. Here's how you do it: First make a lazer copy of the image you are transferring. (either from computer lazer printer or lazer copier) Make sure it is very dark, and this will make the whole process easier. Cut the image smaller and tape one edge of it to your block. Below is Carl explaining the process, you can see the lazer printed image with one side taped to the block.
Put the block down and pour a little mineral spirit over it (please have well ventilated area, I would also advise gloves). Wipe off the excess mineral spirit with a rag and distribute it evenly onto the back of the paper.
After that we took a heating tool, and pressed firmly on the back of the paper where the image is. Some smoke will arise but it's (apparently) normal. Don't press too long or the wand will lose too much heat. You'll notice the image gets fainter if the wand gets too cold if you have a large image to work with. You could also try an iron on the highest setting or one of the small hobby irons.
The transferred image. I liked this, because the image will not rub off, when you handle the plate and it is more accurate than using carbon paper or pencil rubbing to transfer your image.
Here we are hard at work carving our linocuts...
This is my two block print that I started working on. I can't wait to print it at some point in the future. Last class we learned how to mix ink. A tip for some: make sure you use a different ink knife for each can of ink you open, and yet another one for mixing the ink. That way if you have to get more ink out of the cans, you wont contaminate the clean ink with any other colors. For next week, we have to have mockups ready of our prints. I am running behind on this, so I need to go in really early today and try to finish my design before class starts. I'll take some more pictures tonight! I can't wait to see all the cool prints that are going to come out of this class. :)


 Here are Zanetka Gawronski, Brad Strain and Mirka Hokkanen, all ready for our big reception night.
  Here you can see my inconspicuous peeping tom cat box. When you push the slice of wood on the bottom, a cat comes out of the top.


 Here's what my space looked like before the crowd came in.